How to use cards on MacBook to organize files that office workers should know
How to add tags to files or folders
You can add one or more tags to any type of file, like text files, ZIP or image files, or even folders. To add a tag to a file or folder, do the following:
Step 1: Open Finder and select the file or folder you want to tag.
Step 2: Go to “File” on the menu bar.
Step 3: Select the card color in the Cards section.
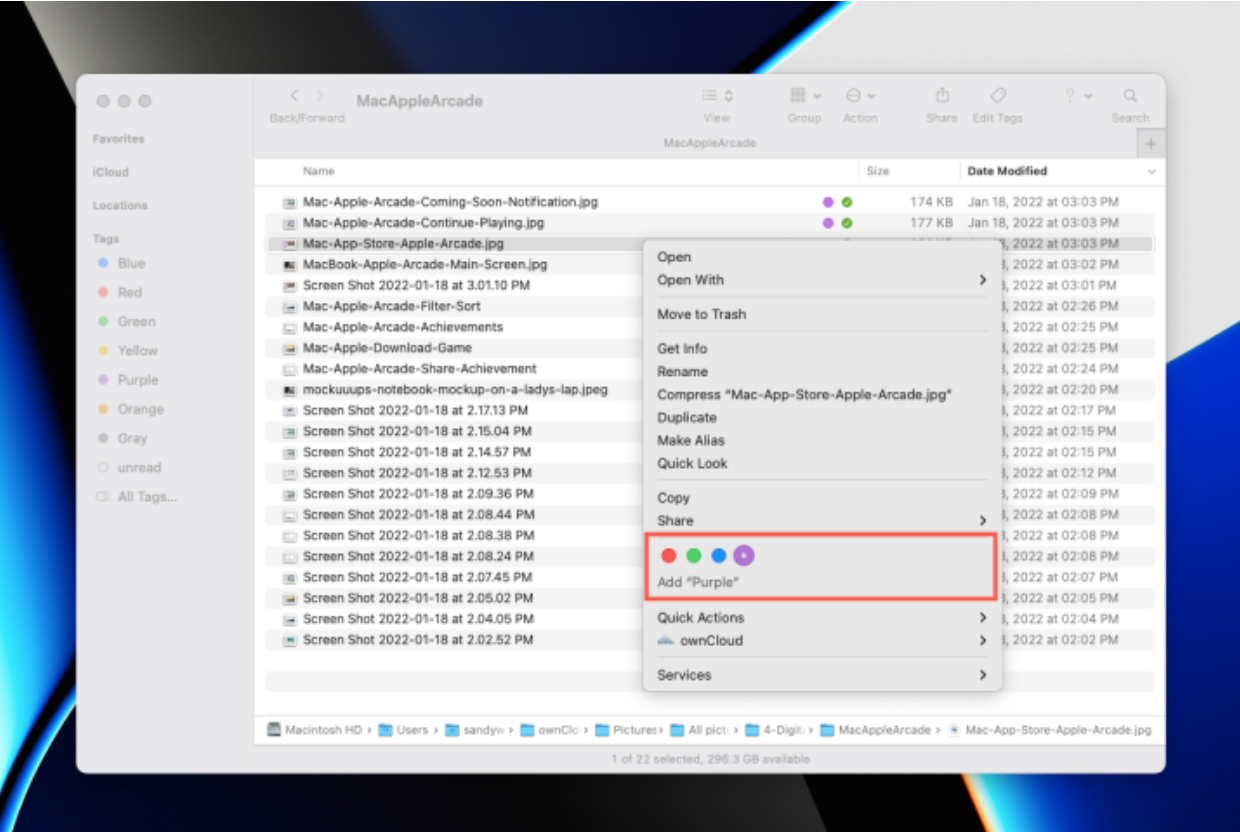
Step 4: Right click on file or folder and choose color to add Tag below.

How to add tags on Macbook. Screenshots
In addition, you can also apply other ways such as selecting more tags in the Finder toolbar, choosing a color, and pressing Return.
Select “Action” in the Finder toolbar and choose a color to add the tag below.
You can also tag an item before archiving. In the “Save dialog” section, choose a card color just below the “Save as field” line.
How to remove tags from files or folders
Step 1: Open Finder and select the file or folder you want to tag.
Step 2: Go to “File” on the menu bar.
Step 3: Select “Remove” for the current card color in the Cards section.
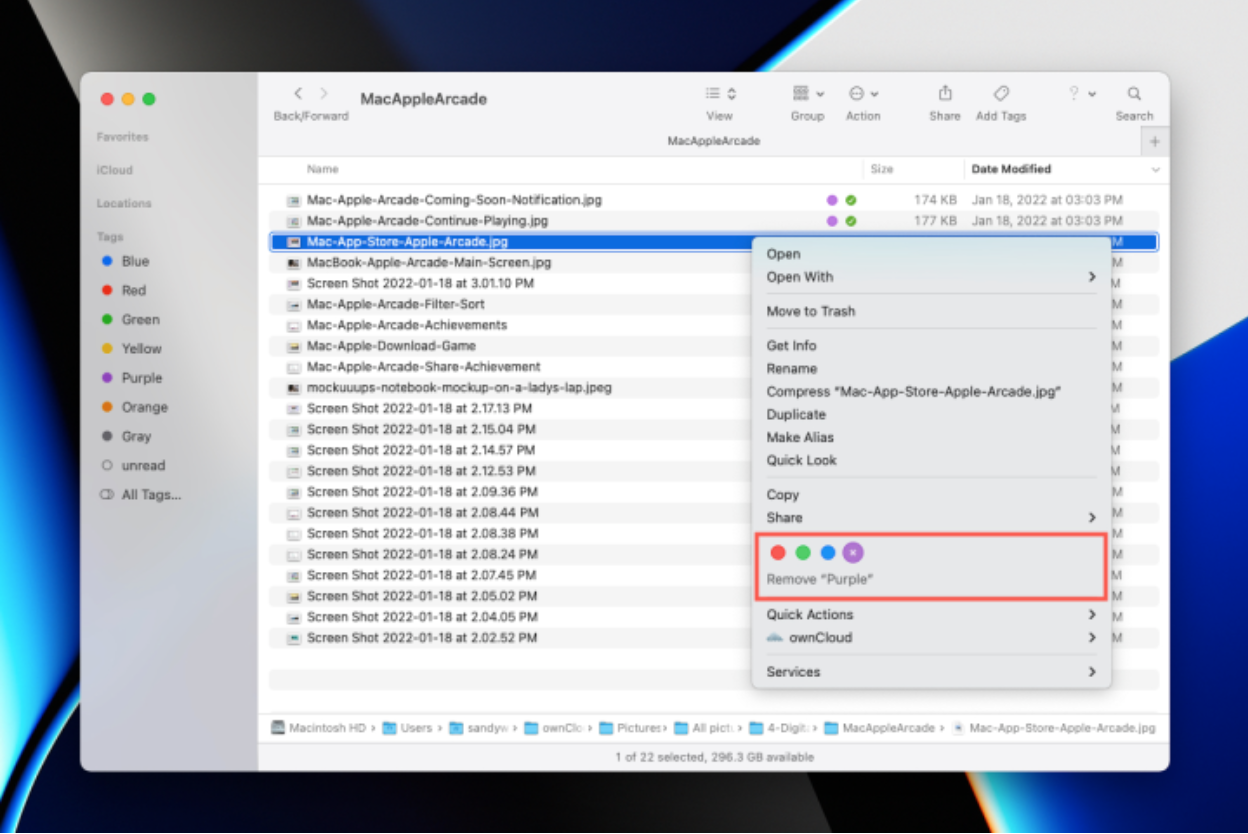
Step 4: Right click on the file or folder, select the tag color and select “Remove”.

How to delete tags in Finder. Screenshots
You can also apply other ways to remove tags such as selecting “Add Tags” from the Finder toolbar, removing the color at the top and pressing “Return”.
Select “Action” in the Finder toolbar, choose a tag color, and select “Remove”
How to edit tags
MacOS gives you cards with a base color and they are named with red, for example a blue card named “Blue”, a red card named “Red”. You can optionally change the color and name of the card according to your needs by following these steps:
Step 1: Open Finder and expand the Tags section in the sidebar.
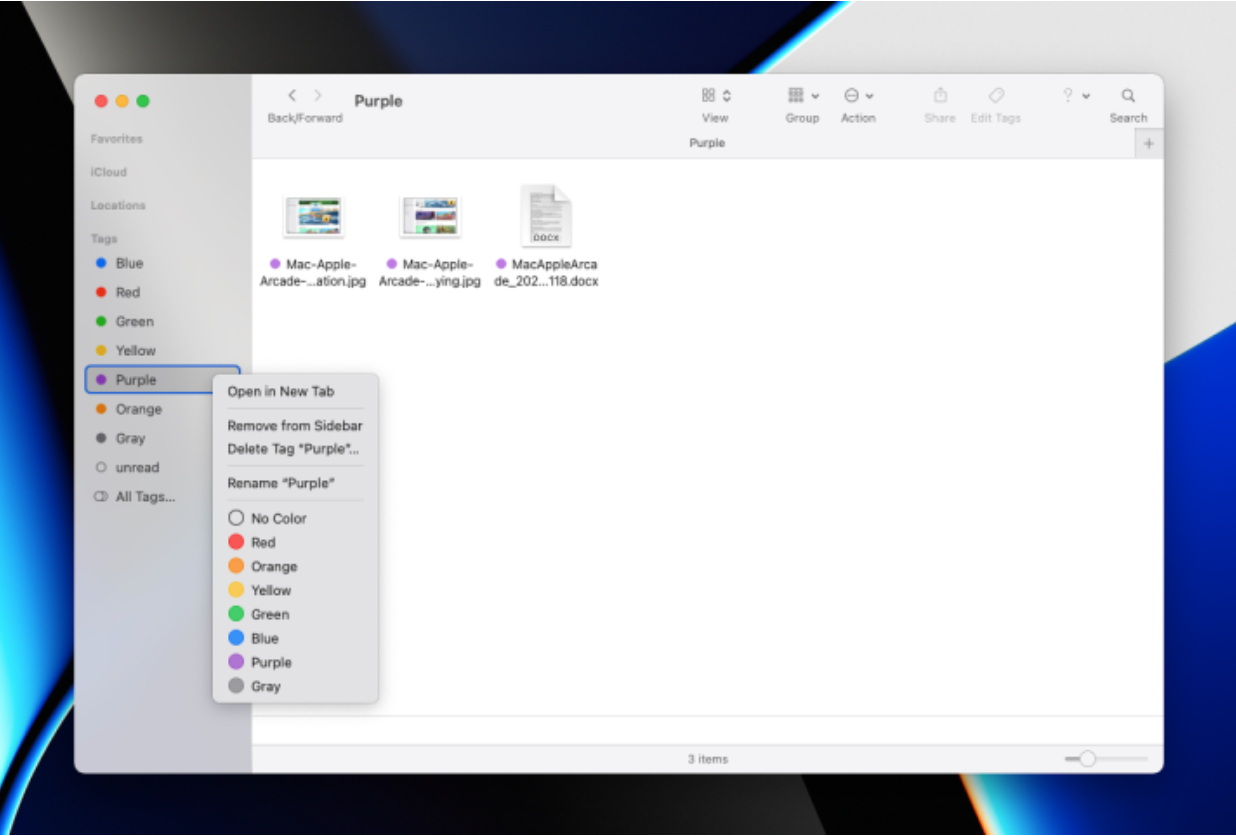
Step 2: Right click on the card you want to edit.
Step 3: Choose a new color for the card. You can also select “Rename” to give the tag a new name or select “Delete” to delete the tag.

Select “Rename” to rename and “Delete” to remove the tag. Screenshots
How to group tagged items
When you add a tag to a file or folder, you’ll see it next to the filename on your desktop and in the Finder. You can also group items by choosing “Group” in the Finder bar and choosing Tags. To add a Tags column, right-click the column header in the Finder and select “Tags.”
How to find items tagged
Sorting items by tags helps you find items quickly. To see all tagged items, simply tap the tag in the Finder sidebar.

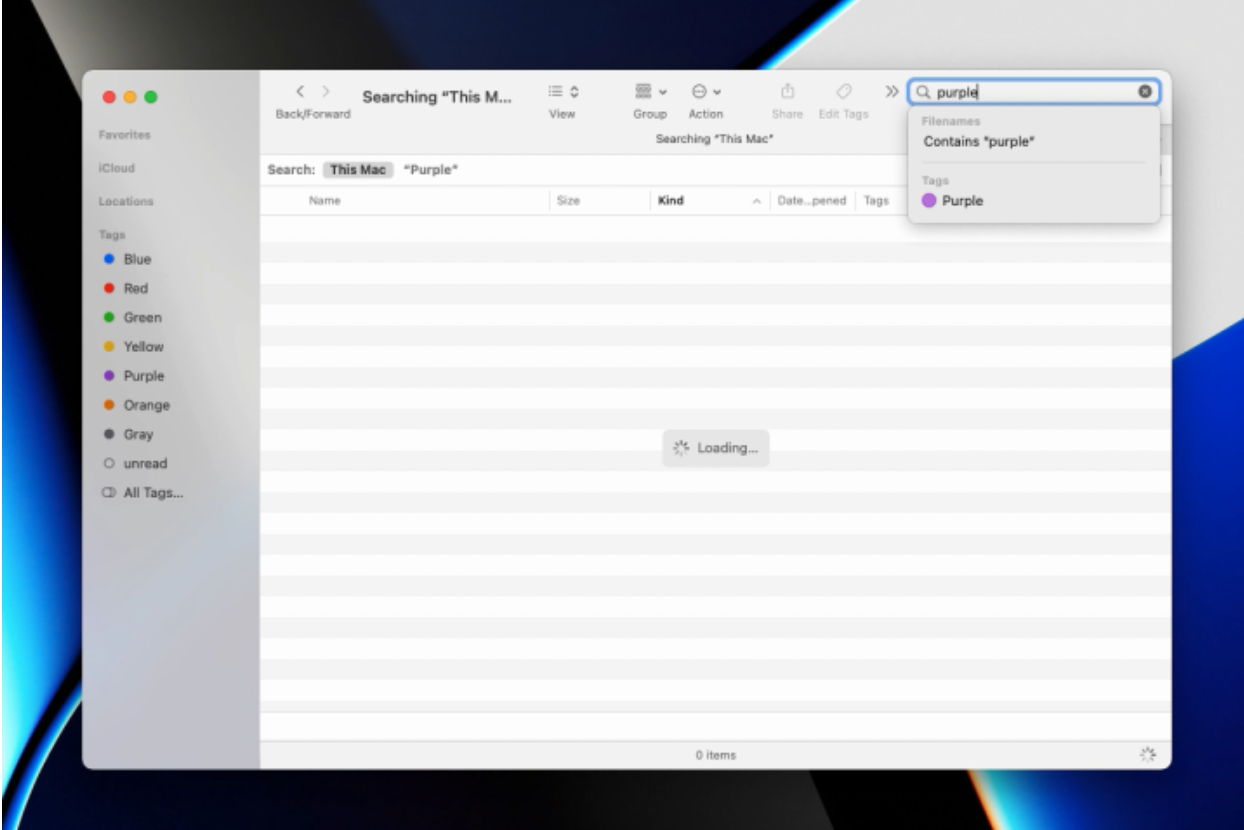
How to find tagged items. Screenshots
Alternatively, you can use the Finder search bar to view tagged items. Just type out the tag name and the items related to that tag will appear.
at Blogtuan.info – Source: danviet.vn – Read the original article here


